
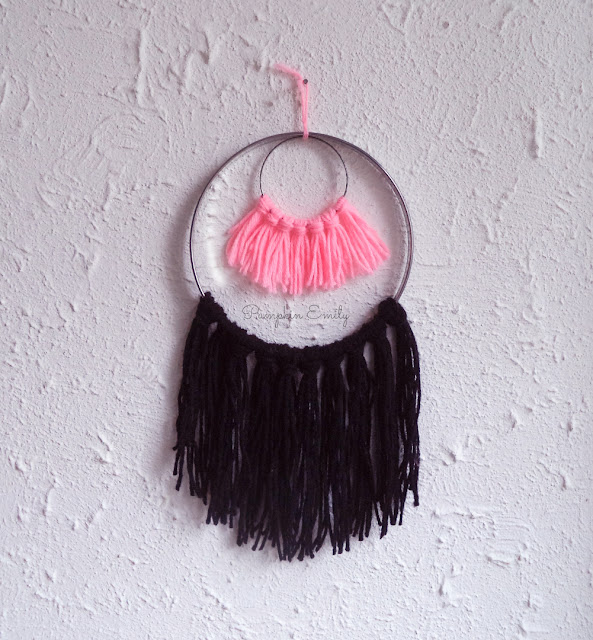
Today I'm going to show you how to make a yarn wall hanging and this yarn wall hanging is a cheap and easy wall hanging decor idea that's perfect for any room. This wall hanging idea can be made in in one hour.
For this macrame wall hanging you can you can use any color of yarn that you want and you can make the yarn any length you want. I think this boho room decor is really easy to make and it came out looking really cute.

I'm going to show you how to make to yarn wall decor. This DIY yarn wall decor idea is a really cute and a cheap and easy DIY and this cheap wall hanging decor ideas is one of my favorite wall hanging ideas that I have made so far.
This wall hanging decoration is perfect door hanging decor idea and a wall hanging decor idea because it will look good in any type of room like a Tumblr room or a boho room. I think It came out looking really cute and I love it.

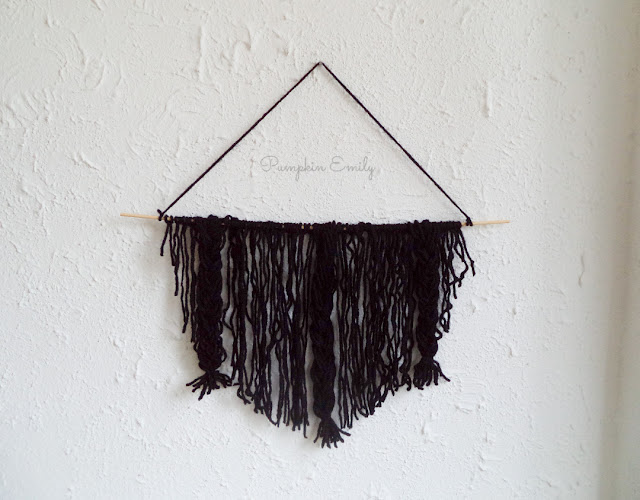
You want to start off by making the braids.
You want to take a long piece of yarn and wrap large loops around the stick that you are using and then you want to cut the bottom of the loops that are opposite of the stick.

You are going to want nine pieces of yarn on the stick and you can cut nine pieces of yarn instead of doing the loops and you also want to separate the yarn into three groups with three pieces of yarn in each group and then you can braid the yarn.


You can make as many braids as you want. I made three braids for mine.
Now for the strands of yarn, you want to make a loop and place the loop of the yarn under the stick.


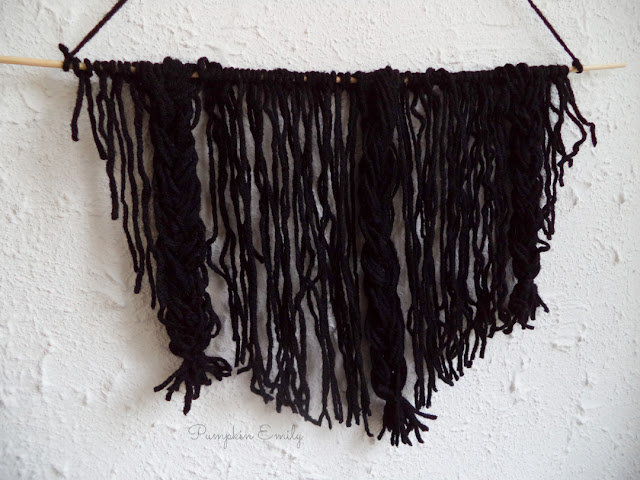
You should get something like this.

To finish off the you want to take your scissors and cut off the extra yarn by cutting the yarn at a angle. By cutting the yarn at a angle you would be getting a shape of a banner or a corner of a triangle.

The last thing you have to do is take a piece of yarn and tie one end to one side of the stick and then you want to tie the other end to the other side of the stick. This will create a loop and it will hang the wall decoration onto the wall.

Question Time!
and that's how you make this yarn wall decoration! In the comments down below let me know what you think about this DIY and what colors would you use.

I'm going to show you three travel inspired DIYs and these are really cheap and easy DIYs. The travel wall art idea is a really cute wanderlust room decor idea. The travel journal is a good way to share memories and the travel jar can help you plan your next trip.
DIY Travel Jar

You will need is a jar, paper, scissors, a hole puncher and ribbon.
1. The first thing you want to do is to make a tag in Canva or another program and then you want to print and cut it out. It can say anything on it and mine says "Where should we go to next?".
2. Take a hole puncher and punch a hole into the tag.
3. Now you can take some ribbon and tie it onto the jar and put the tag onto the ribbon and tie the ribbon into a bow.
4. The last thing you have to do is cut some strips of paper and write a city or a country onto each piece of paper and you also want to fold the piece of paper in half.
5. Then you can put the paper into the jar. You can also put other things into the jar like money for trips.
Now whenever you want to take a trip to another country or city you can pick a piece of paper out of the jar and you can go to that country or city.
DIY Travel Journal
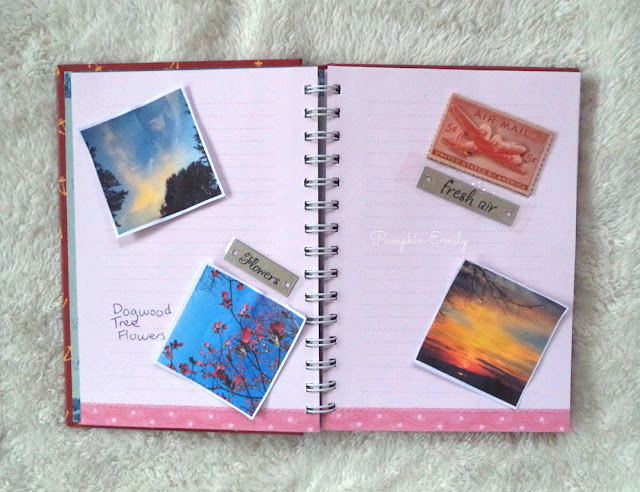
For the second idea I will show you how to use a travel journal.
What you can do is tape or glue any pictures that you have that you took around the world into the journal. You can put stickers into the journal and you can write what each picture is next to the picture.
I think this is a really great way to share all of your memories that you took around the world and over the years.
DIY Travel Wall Art
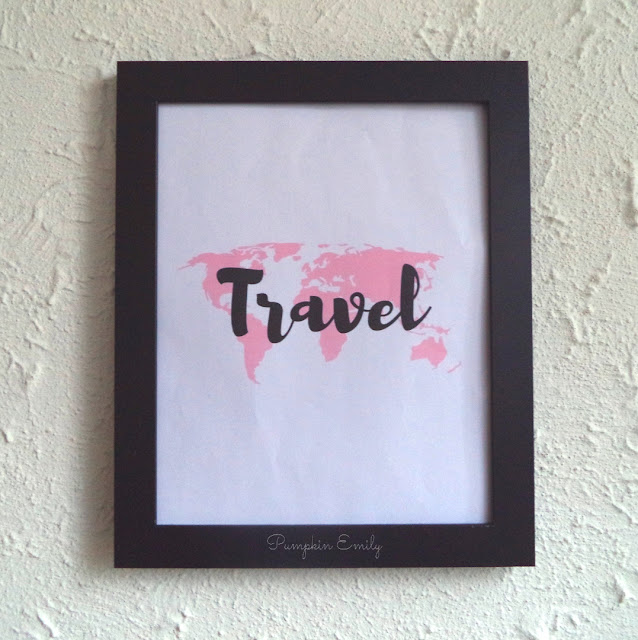
What you will need for this idea is a frame, paper, scissors, and a pencil.
1. To make this art you want to go to Canva and make a image any size that you want just as long as it fits into the frame. Then you can search for a map, put it into the design, make it any color that you want and put some text over the map.
2. Now you can print the image out.
3. Take the front or the back of the frame and place it over the paper and trace around the frame and cut the extra paper off so it fits into the frame.
4. The last thing you have to do is to put the picture into the frame and put anywhere you would like.
That's how you make these travel inspired DIY's! In the comments down below let me know what you think about these travel inspired DIYs.

Today, I'm going to show you how to make three cheap DIY marble room decor ideas and these are all really easy DIY room decor ideas. For the first idea I will show you how to make a marble pencil holder, then I will show you how to make frame art with a marble background, and for the last idea I will show you how to make a marble tray.
For the marble part of these DIY marble decor ideas is made out of normal printer paper but you could use photo paper if you wanted because it gives off a shine like how marble does. I think all of these are really cute room decor ideas.
Marble Pencil Holder
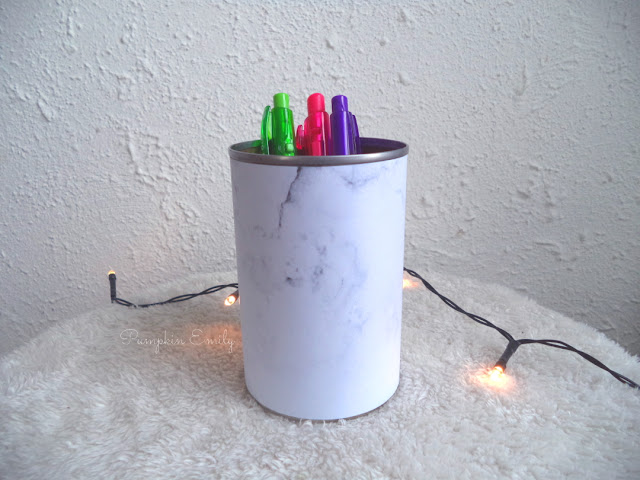
What you will need for this idea is a tin can, scissors, a pencil, a ruler, a glue gun, and you will need to print out some marble onto some photo paper or normal paper and both types of paper will work fine for this idea.


The first thing you want is that if you happen to have no marble around the marble that you printed out, you want to cut around the marble to cut the blank paper off and then you want to place the can at the top of the back of the piece of paper and mark where you would like the marble to stop with a pencil.

Then, you can cut on the line to get a strip of paper to go around the tin can.

The last thing you have to do is to place the can in the middle on the back of the marble paper and take the glue gun and put a line of glue on the can and take one side of the strip of paper and put it onto the glue.


Do the same thing for the other side of the strip of paper.

Now the can is done and you can put anything that you want into the can.
Marble Frame Art Idea
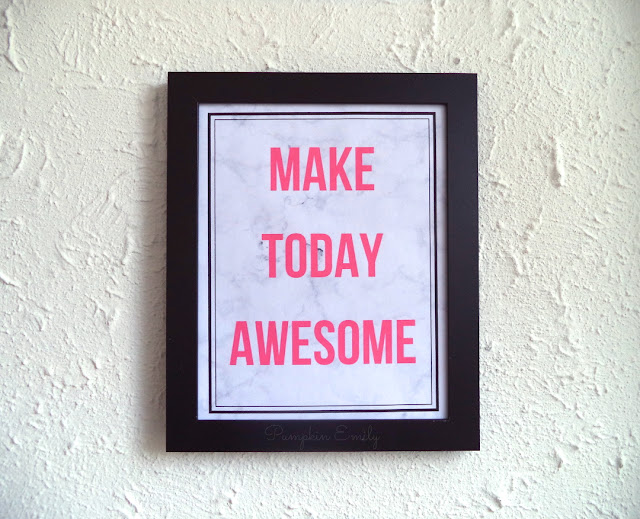
What you will need for this idea is a frame, scissors, a pencil, and a design. For the DIY marble frame art idea you can make any design that you want in Canva, PicMonkey, or any design program. You just want to make sure you put marble in the background of the design.


Now all you have to do is put it into the frame and put it anywhere you would like on your desk or your wall.

Marble Tray

What you will need for this idea is a tray, one or a few pieces of marble paper, it will depend on the size of your tray for the amount of pieces of marble paper you will need to print out. I used two pieces of marble paper for mine. You will also need scissors, a pencil, tape, and a ruler. You can also paint the tray any color that you want.

The first thing you want to do is to cut around the extra paper that's not marble off and make sure you try to keep the sides of the paper even.
Then you want to place one of the pieces of paper into the tray and mark off how much you need to cut off with a pencil.

Now you can take a ruler and make a straight line for how much you need to cut off and cut the extra paper off.
For the second paper you can trace the first piece of paper around the back of the next piece of paper and cut the extra paper off.

Now you want to place both pieces of paper into the tray and make sure they fit into the tray and you want to see where you want the paper to line up in the middle. You basically want it to look like both pieces of marble paper blend together good.
Then you want to cut off the extra paper you don't want.

If you want you can put some paper under the marble paper so you don't see the bottom of the tray.

The last thing you have to do is tape or you can also glue the paper onto the bottom of the tray and if you put paper behind the marble paper make you tape that paper down too. Make sure where the marble meets is taped down flat.

Now you can put anything you want onto the tray like your necklaces or books.
and that's how you make this marble room decoration ideas! In the comments down below let me know what you think about these marble room decoration ideas.

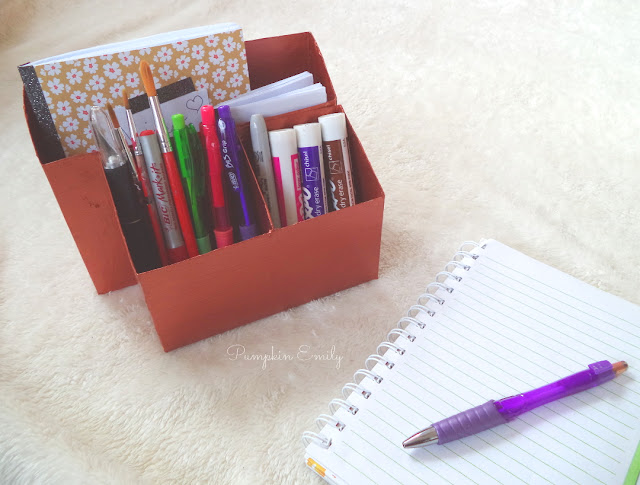
I'm going to show you how to make a organizer out of cereal boxes and it's a copper organizer or you any color you would like to make it. This DIY desk organizer is made out of two cereal boxes and is painted with a few colors of acrylic paint and this DIY copper organizer is a great way to upcycle cereal boxes.
This is one of my favorite organizer ideas and it was pretty easy to make. You can make a bunch of these organizers for your room. I'm probably going to make some more copper DIY ideas!
What you will need for this DIY is two cereal boxes of the same size but if they're two different sizes it will still work, a ruler, scissors, a glue gun, copper or any color of acrylic paint, a pencil, and a paintbrush.

The first thing you want is to take the box that will be in the back and you want to draw a angle on both sides of the box and you can make this any size that you want but remember there's a box that will go in front.
Then you want to draw two lines connecting each point of the angles together on the front and the back of the box and you can use a ruler to make the straight lines.


All you have to do to finish the first box is you want to cut it out.

Now you can make the box the same way as the first box. Just remember you need to make the second box smaller than the first box.

For the divider of the box you want to take the box you just cut out from and you want to cut out the side and match the angle with the angle from the box and trim any of the extra box off so it fits inside of the box.

All you have to do now is put glue on the sides without the angle and put it in the middle of the box. You can also put another divider in there if you want.


All you have to do now is paint the organizer with copper acrylic paint or you can paint it any color that you want.

You want you may have to paint it with more than one coat of paint and you also want to paint all the
sides and inside of the box and when it's dry you can put anything that you want into it.
and that's it! In the comments down below let me know what you think about this organizer.
Subscribe to:
Posts (Atom)


Social Icons