

Hello there! Today I'm going to be showing you how to make how to make five scrapbook paper DIYs. You get to learn how to make a double sided bookmark, a canvas, a clear phone case idea, Polaroids, and a tray.
All of these DIYs are easy to make and they also don't take that long to make too!
You can watch the video below or you can read on.
Wooden Tray

What you'll need:
Wood Tray
Scrapbook paper
Mod Podge
Paintbrush
Acrylic paint
Pencil
Ruler
1. You want to start by painting the tray with any color of acrylic paint and you don't have to paint the bottom of the tray because you are going to be covering it up later with paper but you might want to paint the sides of the bottom. I painted my tray white.
2. When the paint on the tray is dry, you want to flip over your scrapbook paper so you see the back and then you want to line up one of the corners of the paper with one of the corners of the tray.
3. Put a mark on the sides that are connected to the corner that's lined up to a corner and for the third corner you want to measure where it will be with a pencil.
4. Then you can connect the lines and cut off the extra paper.
5. When you have your paper is ready to go, you want to take Mod Podge or another type of glue and brush it on the bottom of the tray.
6. Place the paper on the bottom of the tray and wait for it to dry before you start using it.

Double Sided Bookmark

What you'll need:
Scrapbook paper
Mod Podge
Paintbrush
Scissors
Pencil
Ruler
Yarn or ribbon
1. Measure and cut out the first side of your bookmark to any size that you want. I measured mine to be 6 1/2 x 2 inches.
2. Then you want to trace and cut out what you just cut out so you'll have two pieces.
3. Brush on Mod Podge or another type of glue on the back of one of the pieces of paper.
4. Then you want to place the back of what you just put glue on onto the back of the other piece. If you can see the back of the scrapbook paper on either side of the bookmark you can carefully cut it off.
5. When the bookmark is dry, you want to take a hole puncher and make a hole in the bookmark.
6. Cut a few strands of yarn or ribbon that's long enough to be folded in half. I cut five pieces of yarn.
7. Fold the strands in half.
8. Twist the folded part so it becomes smaller and then you want to run it through the hole of the bookmark.
9. Then you can take the ends of the strands and pull it through the loop.
10. Trim the strands and then you're all done with your bookmark.

Canvas

What you'll need:
A canvas that's smaller than your scrapbook paper. My canvas is 4x4 inches.
Pencil
Scissors
Scrapbook paper
Mod Podge
Paintbrush
1. Take a piece of scrapbook paper and lay it over the top of the canvas and line the paper up with one corner of the canvas.
2. Carefully flip the canvas and the paper over.
3. After you make sure the canvas and the paper is in the right spot, you want to trace the canvas onto the paper.
4. Cut out what you just traced.
5. Before you glue it on you want to make sure it fits and if fits the way you want it you can go onto the next step.
6. Take Mod Podge or another type of glue and brush it on the canvas.
7. Place the back of the paper on the canvas and then you're all done with your canvas.

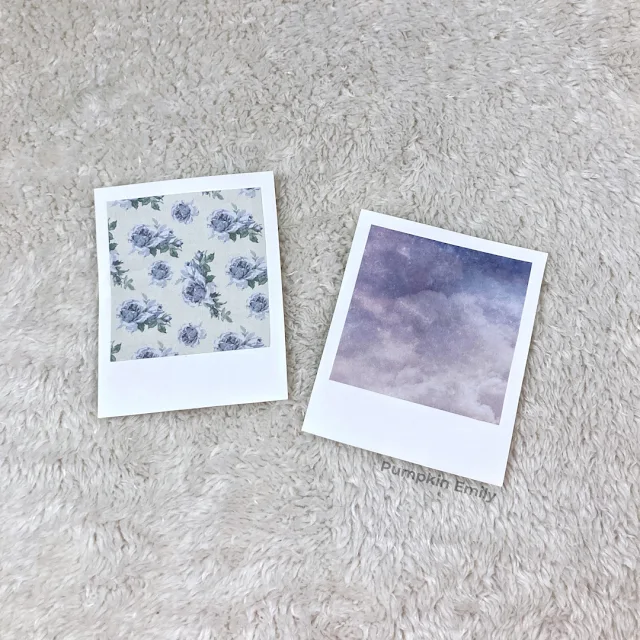
Polaroids
What you'll need:
Cardstock paper
Scrapbook paper
Mod Podge
Paintbrush
Scissors
Pencil
Ruler
2. Brush on Mod Podge or another type of glue on the back of the square.
3. Place the square on a piece of cardstock paper while leaving a border on two sides of the square and this will create two sides of the frame. You can also place it randomly on the paper and create the frame later.
4. After you're done lining up the square, you can add add some more glue if it's needed.
5. Measure one of the sides and draw out the third short side of the border or if you decided to place the square randomly on the paper you can create all three short sides. The shorts sides of my frame measured about 3/4 of an inch.
6. To finish the frame you want to draw out the bottom of the frame. I measured this to be about 13/16 of an inch.
7. Cut it out and erase any pencil markings. Then you're all done. My Polaroid ended up measuring about 3 1/2 by 3 inches.

Phone Case

What you'll need:
Clear phone case
Scrapbook paper
Pencil
X-acto knife
Scissors
1. Tracing a clear phone case on the back of your scrapbook paper.
2. Cut the extra paper off.
3. For the camera hole, you want to place the paper in the phone case and trace the camera hole.
4. Cut out the camera hole out with a x-acto knife.
5. Put the paper back in the phone case or you can put some extra stuff like pictures on it and then you can place the paper in the phone case.
That's how you make these scrapbook paper DIYs!
Which one of these DIYs is your favorite? My favorite is the tray.


2 comments
Oh so good ideas, the polaroid was my favorite
ReplyDeleteThe polaroid DIY is one of my favorites too. Thank you!
DeleteHello! Thanks for your comment! I love to read your comments and I hope you enjoyed reading this post. Make sure to come back to see if I replied back and for new posts. If your comment is spam I'll most likely delete it.