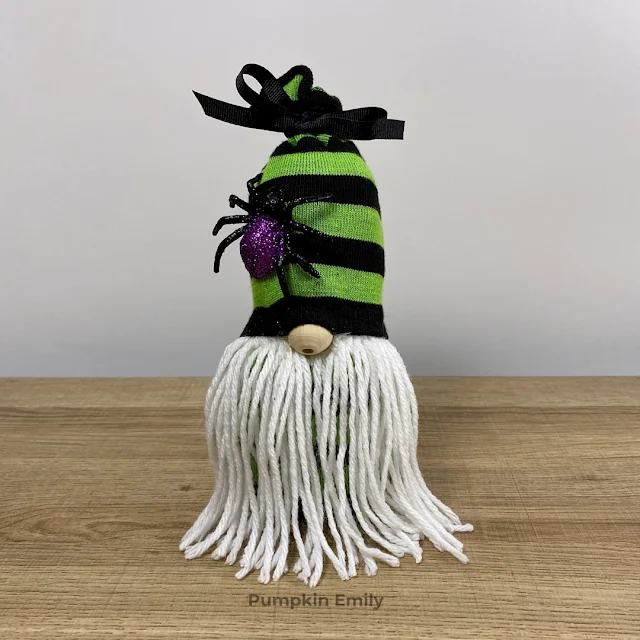
Hello! Today I'm going to be showing you how to make one of my favorite DIYs I ever made. You'll be learning how to make a sock gnome for Halloween or any holiday.
It's easy to make and you can customize it in anyway you would like.
You can watch the video here or you can read on.
What you'll need:
One crew sock
Yarn
Scissors
Hot glue
Tape
Wood bead of any size
Glass gems or something else to put on the bottom of the gnome so it will stand.
Optional: fake spider and ribbon
1. Take a crew sock of any color and make a cut at about where the ankle would be. I used a green and black striped sock.
2. Take the foot part of the sock and place something heavy like rocks on the bottom of it. You want to add just enough so the gnome can stand when it's finished. I used glass gems to fill the bottom of my sock.
3. Stuff the sock with pillow stuffing and make sure you leave room at the top to close it later

5. Cut some pieces of yarn that's long enough to be folded in half and long enough to be on the body of the gnome.

6. Take a piece of yarn and fold it in half.
7. Put the folded part under the yarn that's taped down and pull the ends though the folded part of the yarn.
8. Repeat the same steps until your done and make sure you don't cover the whole strand of yarn that's taped down because you'll be using it later.
9. Take the tape off of the yarn.

10. Put hot glue on the opening of the sock and you want to carefully bunch it together to close it.
11. Before you glue the beard on the gnome, you want to make sure its the size that you want. If its not the size that you want, you can push the yarn closer together or take off some yarn.

12. Glue the beard on by putting hot glue where one end of the beard will be and place it in the glue.
13. Repeat step 12, for the other side of the beard.

15. Then you want to glue it on with hot glue. You want to make sure you try to hide the hole of the bead closer to the yarn and it's fine if you end up showing the hole of the bead.

16. For the hat, you want to take the other part of the sock and trim end you cut earlier but only if you need to. I did this so the sock would look more even.
17. Put the end of the sock that would be originally where you would put your foot through on the gnome.
18. Put hot glue on the top of the bead and the beard.
19. Cover the glue with the sock and make sure you cover the top of the beard.
20. Repeat the same steps for the rest of the hat and make sure you add glue on the sides and the back so the hat stays secure on the gnome.

21. Stuff the hat with pillow stuffing and make sure you like the shape of the hat before you go onto the next step.
22. Put glue in the top of the hat and you want to carefully bunch it together to close it

23. Trim the beard and you can also cut off the ends of the piece of yarn that was used to tie all of the yarn on.

25. Take a fake spider and put hot glue on the bottom of it.
26. Place the spider anywhere you would like on the hat and then you're done.

That's how you make this Halloween sock gnome.
I absolutely love how this gnome came out. It's looks very cute. What do you think about this gnome?


Post a Comment
Hello! Thanks for your comment! I love to read your comments and I hope you enjoyed reading this post. Make sure to come back to see if I replied back and for new posts. If your comment is spam I'll most likely delete it.