

You can watch the video down below!
DIY Yarn Wall Hanging

What you'll need for this DIY:
yarn
twine
wooden dowel
scissors
flowers
hot glue
1. Cut as many pieces of yarn that you want and you can cut them at any length you want. Make sure you cut them longer than you want just in case you want to trim them later. You can also use any color of yarn that you want. I cut 55 pieces of yarn.
2. Bunch five pieces of yarn together and if you need to you can trim them so they're more even on the ends but its not necessary to trim that yarn yet.
3. Fold the yarn in half and then you want to take the loop and place it under a wooden dowel.
4. Pull the yarn though the loop and tighten it. You want to continue this for all of the yarn you want to put on the wooden dowel.

5. Once you're done putting all of the yarn on you want to tie a piece of twine onto each side of the wooden dowel so you can hang it on the wall.
6. Hang it on the wall and trim off any excess yarn. You can also form it into a point like how I did or you can make it a straight line.

8. Lay them out where you want them to be and then you can hot glue them onto the top of the yarn. The way how I did this was by gluing the leaves onto the back of the flowers first and then I glued the flowers onto the yarn.
After you're done glueing them the flowers on you can hang it anywhere you would like and then you're all done.


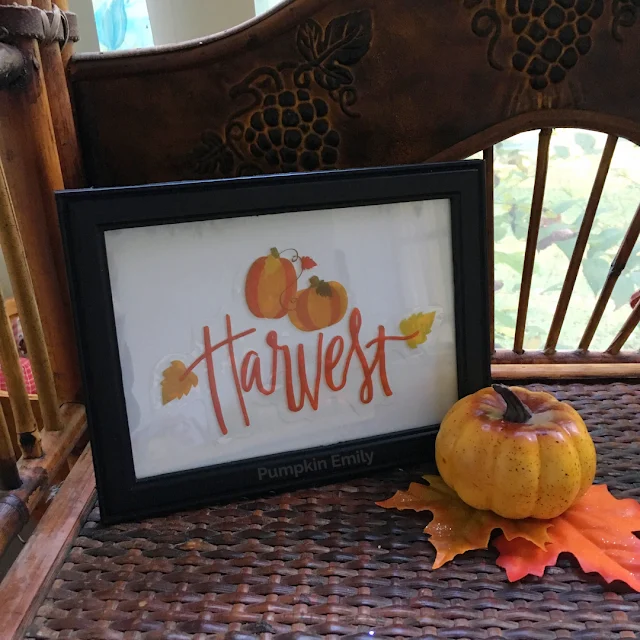
DIY Fall Frame Art
What you'll need for this DIY:
frame
cardstock paper
scissors
pencil
window clings
1. Trace the glass or the back of the frame onto a piece of cardstock paper or you can use printer paper instead.
2. Take the outer frame and use it as a window to see which window cling will fit in the frame.
3. Stick the glass, the paper, and the back of the frame in the frame
4. The last thing you can do is that you can take a window cling and put it on the glass. harvest clings

DIY Mug Flower Arrangement

What you'll need for this DIY:
mug
fake flowers
wire Cutters
All you have to do for this DIY is that you want to cut some fake flowers with wire cutters and then you want to place them into a mug.

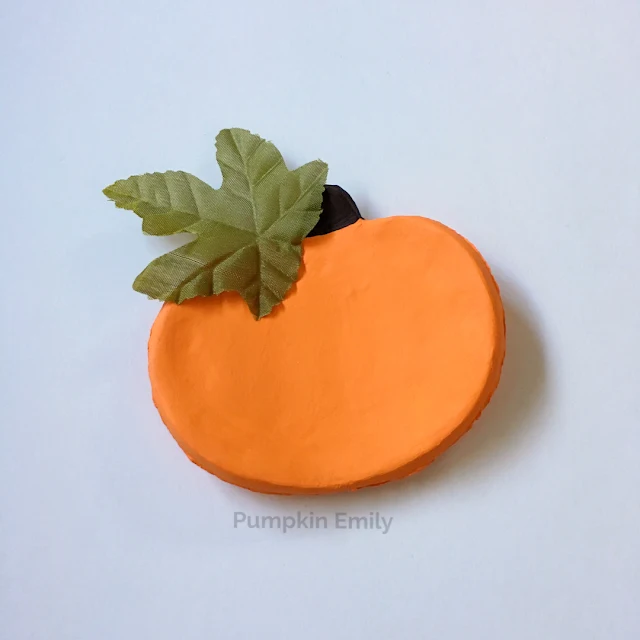
DIY Pumpkin Bowl
What you'll need for this DIY:
air dry clay
parchment paper
rolling pin
plastic wrap
bowl
pumpkin cookie cutter
fake leaf
hot glue
Mod Podge
paint
paintbrush
scrap piece of paper
1. Roll out a piece of air dry clay onto a piece of parchment paper and make sure you make the clay thick enough so it doesn't break.
2. Take a pumpkin cookie cutter and press it into the clay.
3. Remove the extra clay. If you need to you can use a x-acto knife to help separate the clay from the cookie cutter cut off the extra clay and if the clay gets stucks in the cookie cutter you want to carefully take it out of the cookie cutter.
4. After you're done removing the extra clay you want to smooth out any of the edges or cracks with water and your finger.

5. When you like how the pumpkin looks you can place a piece of plastic wrap in a bowl.
6. Carefully pull the clay off of the parchment paper and if you need to you fix any cracks with water
7. Place the pumpkin into the bowl
8. Wait for the bowl to dry and you want to follow the instructions on your air dry clay
9. When the pumpkin bowl is dry, you can carefully take the pumpkin out of the bowl and remove the plastic wrap off of it.
10. Place the pumpkin on a piece of scrap paper and then you can paint it any color you would like. I painted the pumpkin orange and the stem brown. I also painted the bottom but its an optional step.
11. The last thing you can do is that you can take a fake leaf and you glue it onto the pumpkin with hot glue, Mod podge or another type of glue.

I found this out because I slightly moved the leaf when the glue wasn't completely dry and the paint peeled so I decided to place some mod podge under the leaf and that seemed to hold it into place.
You can do that to if you have any issues but either can work but mod podge might work better.

Once you got the leaf onto the pumpkin you're all done and you can place whatever you would like on it like a ring.

That's how you make all of these fall room decoration ideas! In the comments down let me know which DIY is your favorite.


Post a Comment
Hello! Thanks for your comment! I love to read your comments and I hope you enjoyed reading this post. Make sure to come back to see if I replied back and for new posts. If your comment is spam I'll most likely delete it.