

Hello there! Here you'll learn how to make bookmarks with three aesthetic designs. I'll be showing you how to make a moon bookmark, a crystal bookmark with a word on it, and a ombre geometric bookmark.
All three of these aesthetic paper bookmark ideas are really easy to make. I think all three of the bookmarks came out pretty. My favorite is the moon bookmark. Which one is your favorite?
You can watch the video version here:
What you'll need for all of these bookmarks:
Black or white cardstock paper
Paint
Paintbrushes
Markers
Pen
Pencil
Ruler
Scissors
Moon Bookmark

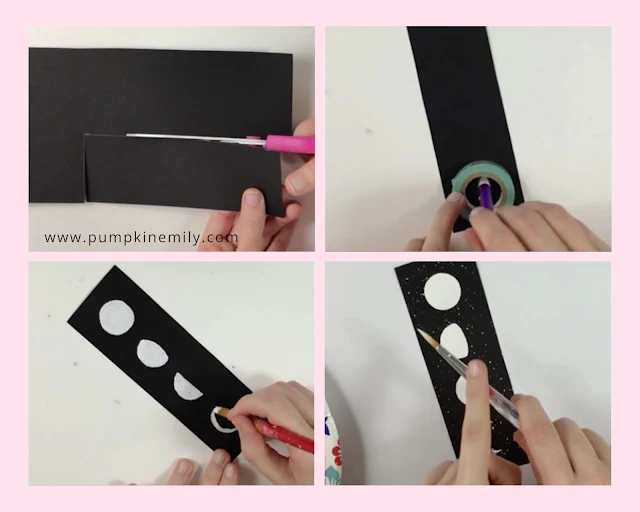
1. Cut out a bookmark out of black cardstock paper. You want to make the bookmark to be about 6 by 2 inches or you can make it any size that you want. If you want to put more moons on the bookmark you want to make the bookmark longer.
2. When you're done cutting out your bookmark, you want to take something circular and trace it to make four phases of the moon.
I used washi tape to make the moons. You can use a ruler to help measure them apart. It also might be easier to start from the top moon and the bottom moon and you can draw the middle moons last.
3. Paint the moons in with white paint.
4. Lay your bookmark on a scrap piece of paper.
5. Water down white acrylic paint and then you want to tap the paintbrush over the bookmark to create stars.
6. When the paint is dry, you want to erase any pencil markings and you're all done.
Crystal Bookmark

1. Cut out a bookmark out of white cardstock paper and you want to make the bookmark to be about 6 by 2 inches or any size.
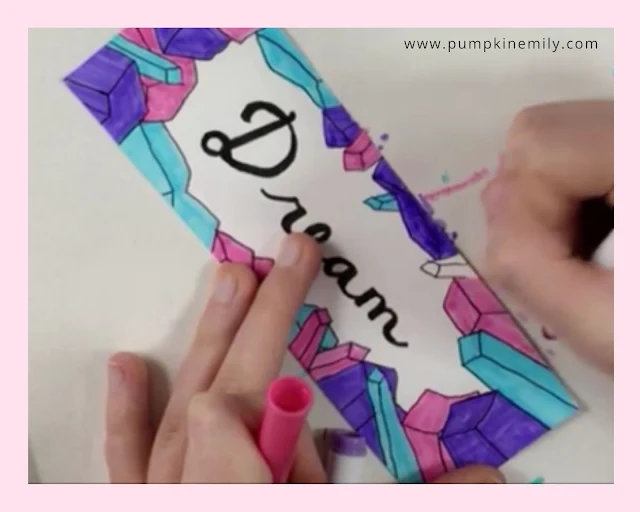
2. After you're done cutting out your bookmark, you want to write a word in the middle with a pencil. I wrote the word dream on my bookmark but you can write whatever you would like on the it.
3. Draw crystals on the border of the bookmark with a pencil.
4. When you're done drawing the crystals, you can go over the crystals with a pen and then you can go over word with a marker.
5. After the ink is dry, you can erase any pencil markings.

6. When you're done erasing, you can color in the crystals any color that you want. I colored mine pink purple and blue.
When you're done coloring in the crystals, you're all done.
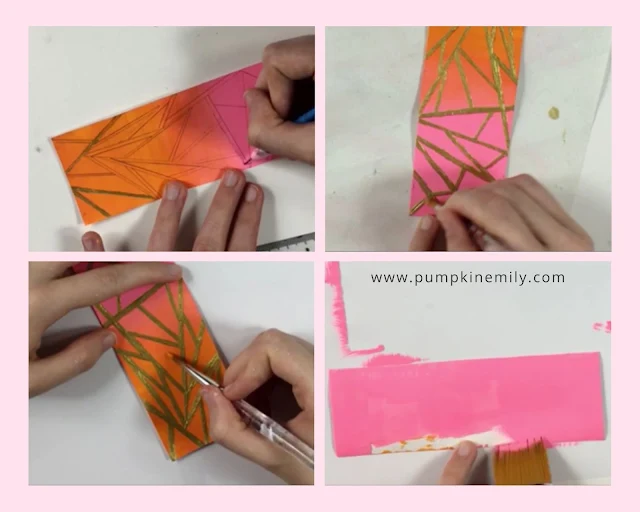
Ombre Geometric Bookmark

The last bookmark I'm going to show you how to make is this ombre geometric bookmark.
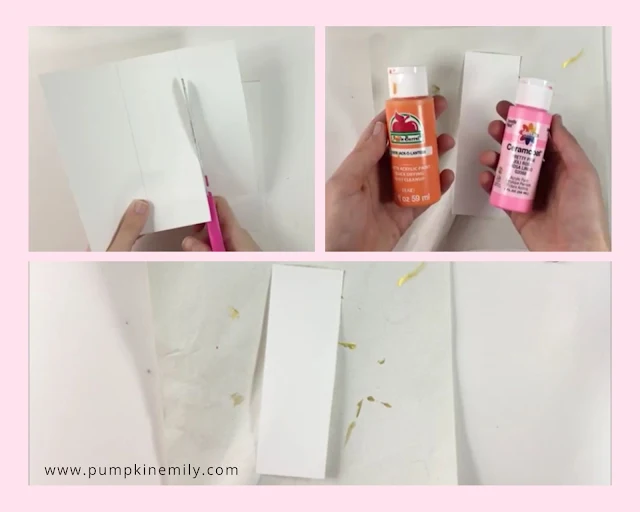
1. Just like the other bookmarks, what you want to do is that you want to cut out a bookmark out of white cardstock paper and you want to make the bookmark to be about 6 by 2 inches or any size.
2. For the next part of this bookmark you're going to lay your bookmark on a scrap piece of paper and you're going to need two paintbrushes and two colors of acrylic paint. I used the colors orange and pink.
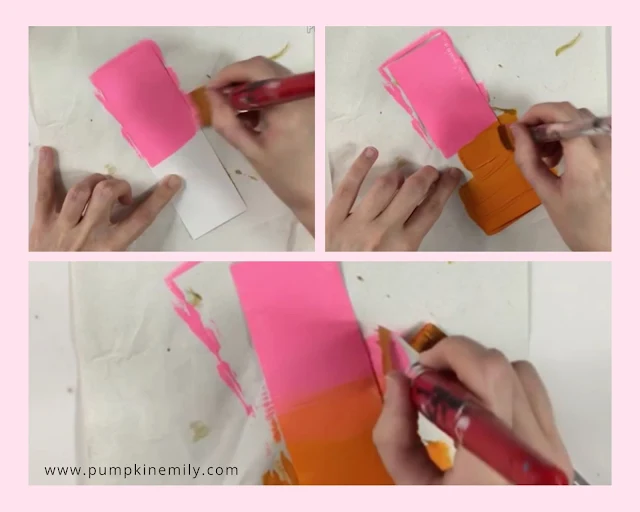
4. Then you want to blend the paint that's in the middle of the bookmark to create a ombre effect.
To help with the blending, you can switch paintbrushes and you can also dry off your paintbrush but you're going to want to keep a little bit of paint on the paintbrush so you can still blend the paint.
5. When the paint is dry, you can draw stripes in different directions all over the bookmark.
6. Then you can paint in the stripes in with any color that you want. I painted my stripes gold.
7. Once you're done painting the stripes, you can go back and clean up any lines or any spots that are messed up.
8. When the front of the bookmark is dry, you can paint the back of the bookmark but this a optional.
If you paint the back, make sure you're careful that you don't get paint on the front or your going to have to go and fix the front of the bookmark.
9. Once the paint is completely dry, you can erase any pencil markings and you're all done.
That's how you make all three of these bookmarks! I love how all of them turned out.


2 comments
It really helped thank you so much . I was in the in difficult situation for my project the day before . It is very easy and simple . Once again thanks 😊 🙏
ReplyDeleteYou're welcome!
DeleteHello! Thanks for your comment! I love to read your comments and I hope you enjoyed reading this post. Make sure to come back to see if I replied back and for new posts. If your comment is spam I'll most likely delete it.