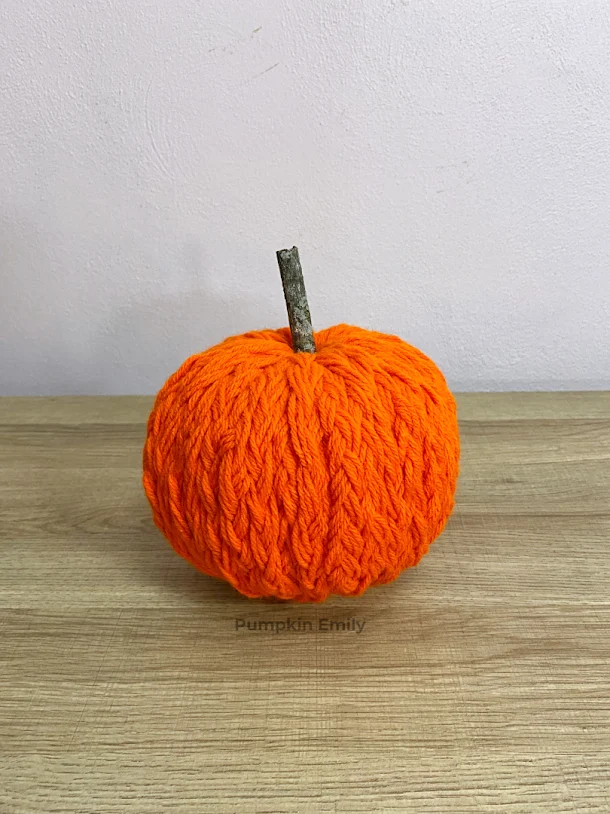
Hi there! Today, I'm going to be showing how to make yarn pumpkins in two ways. The pumpkins I'll be showing you how to make is a braided yarn pumpkin and a chunky yarn pumpkin. Both of these are easy to make and they make great fall decorations.
You can watch the video below or you can continue reading.
Chunky Yarn Pumpkin

What You'll Need
What you'll need for this chunky pumpkin is a foam pumpkin that you can get from Dollar Tree, a paperclip, scissors, x-acto knife, a stem, and thick yarn because it will take you forever to get it done if you use thin yarn.

2. Flip the pumpkin over so you see the bottom of the pumpkin and you want to make another hole that's about the same size as the hole on the top of the pumpkin.
3. Dump the foam out so you don't get foam everywhere.
4. Cut a long piece of yarn and stick one end of the yarn in the hole that's on the top of the pumpkin.
5. Take the other end of the yarn and pull it through the hole on the bottom of the pumpkin and pull it through the top hole.
6. You want to keep wrapping the yarn around the pumpkin until you get to the end of the yarn and to make things easier you can put a paper clip on the yarn so its easier to pull the yarn through the holes.
7. Put the end of yarn inside of the pumpkin and if you want you can wrap it around one of the bottom pieces of yarn so it stays where you want it to or if the yarn is long enough to be on the side you can wrap the yarn around one or more pieces of yarn that's on the side of the pumpkin so the yarn is not wasted.
8. Continue with the steps 4-7 until the pumpkin is completely covered.
9. If you decided to wrap the end of the yarn on the side of the pumpkin you want to trim off the excess yarn whenever you're done wrapping the yarn on the pumpkin.
10. Put a branch or something else into the top of the pumpkin to make a stem and you're all done with your pumpkin.


Braided Yarn Pumpkin

The last pumpkin I'm going to show you how to make is a braided pumpkin and this one may take a little longer to make than the chunky yarn pumpkin.
What You'll Need
What you'll need for this pumpkin is yarn, scissors, x-acto knife, a stem, and a foam pumpkin that you can get from Dollar Tree.

1. Take the stem out of the pumpkin and then you want to cut a hole out of the top of the pumpkin with a x-acto knife. You want to make this hole about 1 1/2 inches.
2. Cut 9 pieces of yarn that measures about 30 inches.
3. Tie the ends of all 9 pieces of yarn together in a knot.
4. Now to make the braid you want to either tape the knotted end down or you can put it on a clipboard so it stays in place.
5. Separate the yarn in groups of three and braid it.
6. When you get to the end of the braid you want to tie it into a knot.
7. Repeat the steps 2-6 to make more braids. I made about 20 braids.
8. Now you can start putting the braids on the pumpkin by laying out a braid and putting the pumpkin in the middle of it. Then you want to put the ends of the braids in the hole.
9. For the next braid you want to turn the pumpkin before putting the braid on the pumpkin because it will be harder for the braids to fall off of the pumpkin.
10. Follow the same steps until you have covered the pumpkin and make sure you keep rotating the pumpkin before you put the ends of the braids in the pumpkin.
11. After you're done putting the yarn on the pumpkin you can carefully move the yarn on the bottom of the pumpkin so it can sit the way you want it to.
12. Put a branch or something else into the top of the pumpkin to make a stem and you're all done.


That's how you make these yarn pumpkins.
What do you think about these pumpkins? I love how both of them came out and I can't believe how easy they are to make.


Post a Comment
Hello! Thanks for your comment! I love to read your comments and I hope you enjoyed reading this post. Make sure to come back to see if I replied back and for new posts. If your comment is spam I'll most likely delete it.