
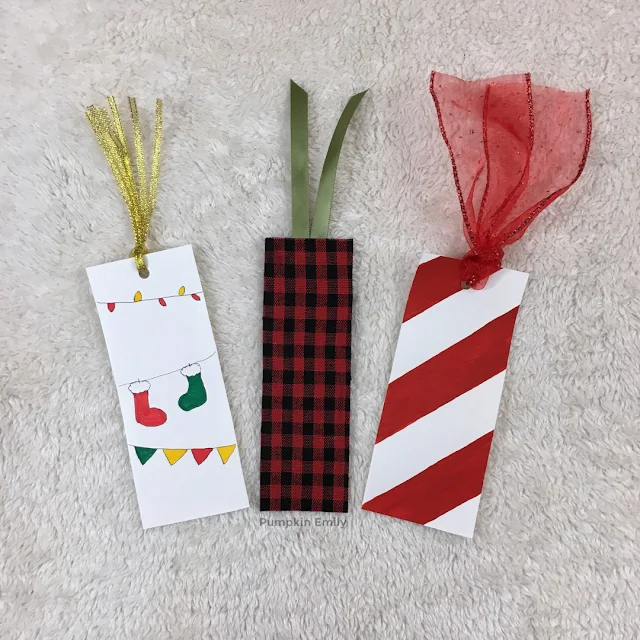
Hello! In this post and in the video you'll learn how to make Christmas bookmarks with three different designs. You'll learn how to make a fabric bookmark, a candy cane striped bookmark, and you'll also learn how to make a banner with drawings on it.
The striped bookmark is my favorite. Which one is your favorite?
To learn how to make these bookmarks you can watch the video below or you can read on.
Candy Cane Striped Bookmark

You're going to need:
Cardstock paper
Ruler
Paint
Pencil
Ribbon
Scissors
Hole Puncher
1. Start by drawing and cutting out a bookmark of any size out of white cardstock paper. I made mine to be 6 by 2 1/2 inches.
2. Draw out your stripes with a pencil and you want to measure them to be 1 inches apart with a ruler.
3. Paint the stripes in with any color of paint. I painted mine red.
To make things easier I marked the stripes I wanted to paint by adding a spot of paint on the ones I wanted to paint. I also painted the edges of the stripes first and then I painted them completely in.
4. When the paint is dry, you want to make a hole in the bookmark with a hole puncher.
5. Take a piece of ribbon and fold it in half.
6. Pull the loop of the ribbon through the front of the bookmark and take the ends of the ribbon and pull it through the loop.
7. If you need to you can trim the ribbon and then you're all done.

Plaid Fabric Bookmark

You're going to need:
Cardstock paper
Ruler
Mod Podge
Paintbrush
Pencil
Ribbon
Scissors
Hole Puncher
Any color of fabric or fabric ribbon.
2. Take a piece of fabric or a piece of fabric ribbon and you want to cut it slightly larger than your bookmark. I used plaid fabric ribbon but you can use any type of fabric that you want.
3. Paint Mod Podge onto one end of the bookmark and lay the fabric with the back facing up. Then you can place the paper on the fabric. If your fabric has lines make sure it's even.
4. Once you have the end of the bookmark done, you can repeat the same steps on the rest of the bookmark but do not put any mod podge where you want the ribbon to go.
5. When the Mod Podge is dry you can trim off the extra fabric
6. Cut two pieces of ribbon.
7. Lift up the fabric and lay the two pieces of ribbon where you want them to be and then you can paint some Mod Podge there and underneath the ribbon.
8. Once you have where you want your ribbon to be you want to lay the fabric back down and let it dry.
If you need to you can add more Mod Podge on the sides so the fabric stays down and you can trim the ribbon.
When it's dry you're all done and you can start using it.

Christmas Doodle Bookmark

You're going to need:
Cardstock paper
Ruler
Markers, colored pencils, or paint
Pencil
Pen
Ribbon
Hole Puncher
Scissors
1. Cut out your bookmark out of white cardstock paper. I made my bookmark to be 6 by 2 1/2 inches.
2. Draw three banners or whatever you would like with a pencil. I drew three banners with christmas lights, two stockings, and a banner with triangles on it.
3. After you're done drawing on your bookmark, go over it with a pen.
4. When the ink is dry you want to erase the pencil markings.
5. Color everything in with anything you would like. I used markers.
6. Put a hole in the bookmark with a hole puncher.
7. Cut one to three pieces of ribbon and fold it half.
8. Then you can run the loop of the ribbon through the hole and run the ends of the ribbon through the loop.
If you need to you can trim the ribbon to the length you want it to be and then you're all done.

That's how you make all three of these Christmas bookmarks!


Post a Comment
Hello! Thanks for your comment! I love to read your comments and I hope you enjoyed reading this post. Make sure to come back to see if I replied back and for new posts. If your comment is spam I'll most likely delete it.